Celer and NuFi Bridges
Author: Frank Chukwurah
Date: 15/10/2023
Article Exploring Celer and NuFi Bridge
Let’s cut right to the chase, in this article, we’ll be exploring two different apps; these apps are Celer Network and Nu.fi — these apps use Milkomeda respectively.
INTRODUCTION
From a bird’s-eye view, interoperability has been a stumbling block for many projects in the blockchain industry. But hey, the blockchain industry has taken a new turn since the introduction of bridges. Just like a bridge connects two physical locations together in the real world, bridges are also crucial for blockchains because they foster the connection of several distinct blockchains while enabling users to transfer data and assets across different blockchains.
Without further ado, let’s jump right in! First off, I’ll introduce Celer cBridge.
What Is Celer cBridge?
The Celer cBridge is known to be a decentralized and non-custodial asset bridge that supports over 170+ native tokens across 40+ blockchain networks and layer-2 Rollups.
There are two distinct models that facilitate the transfer of assets across different chains on cBridge, they are:
POOL-BASED BRIDGE
The Pool-Based Bridge works by creating two liquidity pools on the transfer and destination chains, respectively. Since Celer cBridge allows for the bridging of tokens across diverse chains, the StableSwap pricing curve will be implemented to dynamically alter the bridge rate based on the balances of the two liquidity pools that were created.
MINT & BURN — OPEN CANONICAL TOKEN BRIDGE
To facilitate token transfers on cBridge, cBridge uses a PeggedToken contract that mints pegged tokens for users or burns them on the destination chain. It works by transferring tokens from the transfer chain to the destination chain, these tokens will be locked on your transfer chain, but you will receive an equivalent amount of minted pegged tokens on the destination chain as well.
How To Bridge Tokens On The Celer cBridge?
To start exploring the Celer Bridge transfer, you can visit this link, it is very straightforward and doesn’t require any technical know-how.
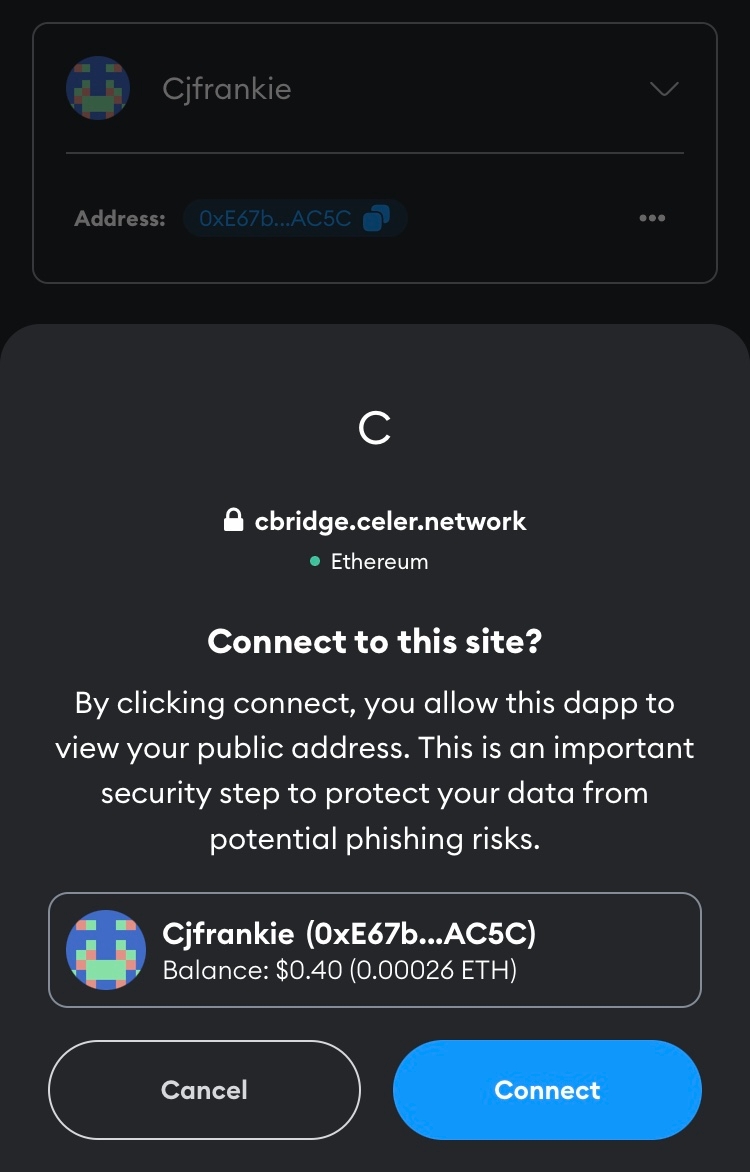
Thankfully, Celer cBridge supports a variety of wallets including but not limited to MetaMask, Coinbase Wallet, WalletConnect, Clover, and Coin98 Wallet, just to name a few. Select your desired wallet to start moving assets across multiple chains with a single click of a mouse (e.g. MetaMask). A prompt will be displayed, asking if you’d like to switch the network. To go forward, click on the switch network button.

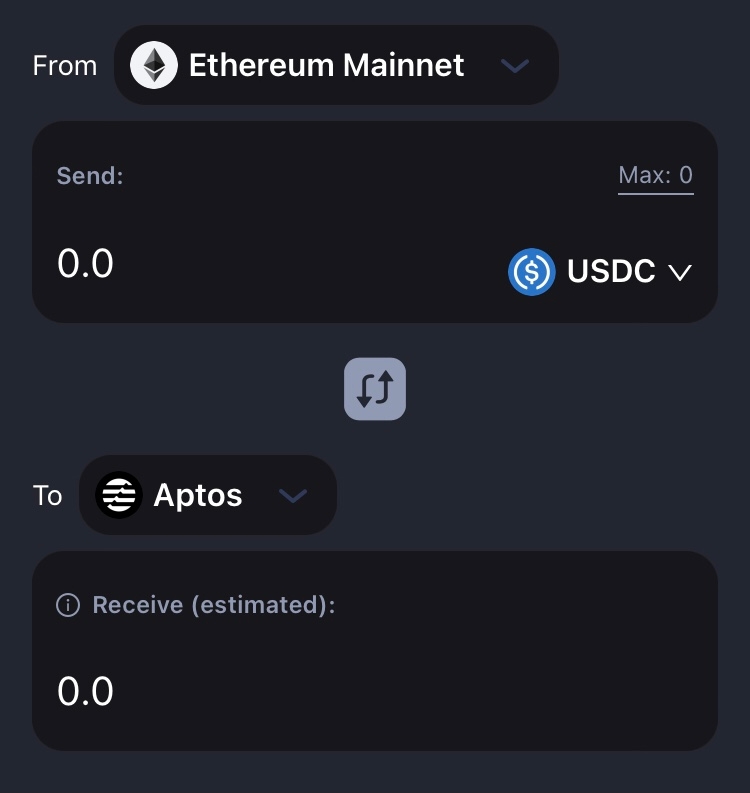
After you’ve successfully switched to the preferred network, select your sending and receiving as well. For instance, let’s say we want to move an Ethereum token to the Aptos chain, simply select Ethereum on the “From” section and Aptos on the “To” section. You can also click the token drop-down to see more tokens that can be bridged.

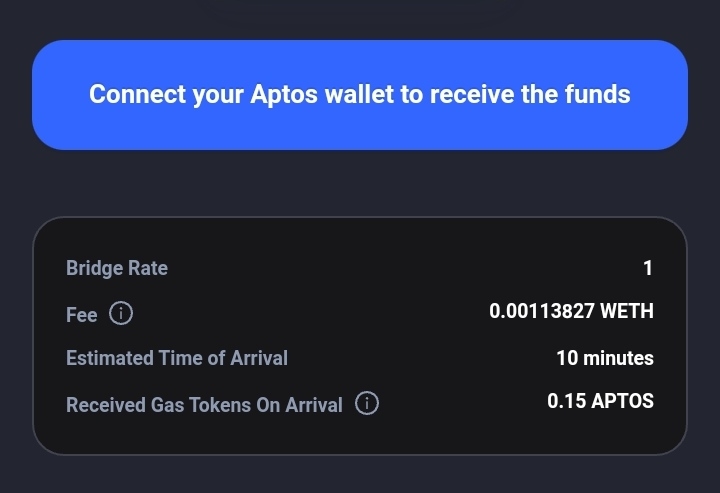
More so, you will also get insights into the amount you will receive by entering the quantity of Ethereum token you wish to send. Once you’ve input it, connect to Aptos wallet to receive the fund.

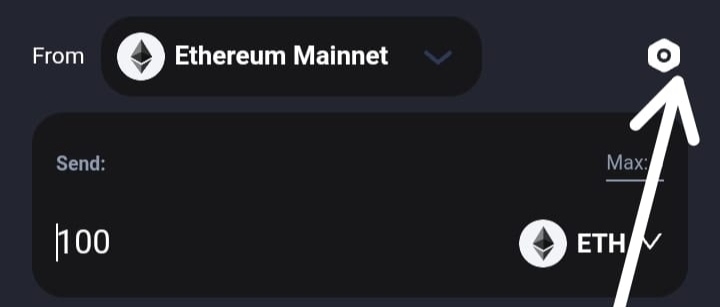
Finally, click on the gear button, this will allow you to adjust the slippage tolerance after your preferred Aptos wallet has been connected. Next, review the transfer details and click on Transfer. Approve the transaction, confirm, and your transaction will be completed in a few minutes. It only takes around 5–20 minutes. To check if you have received your Ethereum token, you can switch to the Aptos chain.

That’s all for Celer cBridge, we now move to the second blockchain bridge which is called NuFi Bridge.
What Is NuFi?
NuFi exists to be a non-custodial crypto wallet that was solely designed to make crypto staking secure and easy on multiple PoS blockchains including Cardano (ADA).
How Does NuFi Bridge Work?
With the NuFi bridge, it’s easy to move assets between chains using permission-less bridges. Users do not need a centralized exchange like Binance to swap ETH for ADA. The NuFi wallet now supports Cardano, Milkomeda C1, and Ethereum blockchain as well. Having known that, you’ll also need to install NuFi wallet’s browser extension and create a wallet or import an existing one if you have.
First things first, you should disable your MetaMask/Flint wallet extensions if you have them installed already! (Click Extensions icon > Manage extensions > Turn MetaMask/Flint off).
When connecting to any dApps, select connect with MetaMask/Flint, we just disabled that a few minutes ago right? Yes! Don’t fret! NuFi will open instead.
Thankfully, the wallet emulation mode will enable NuFi to connect in place of popular wallets on Cardano, Ethereum, Milkomeda C1 plus, and Solana blockchains (since other wallet extensions have been disabled).
How to Move Assets Between Cardano and Milkomeda C1 (and get MilkADA)
If you already have MetaMask/Flint wallets turned on or installed, kindly disable and have them turned off; then visit Blueshift Bridge Here
Select connect with MetaMask/Flint and NuFi will open in place of MetaMask/Flint.
You will get a prompt asking you to connect your NuFi wallet, Cardano and Milkomeda C1 accounts.
You can now start bridging ADA from Cardano to Milkomeda C1, where it becomes MilkADA (the native asset used to pay gas fees).
N.B: Keep in mind that you may need to import a Milkomeda token’s information before it displays in your NuFi wallet. To do that, navigate to Manage Account on the Accounts screen, and click Import Token. Simply paste the token’s contract address or search for the token from the drop-down list.
How to Move Assets from Ethereum to Milkomeda C1
Firstly, MetaMask should be disabled if you have them on already. Then, head over to Celer cBridge.
Select connect with MetaMask/Flint and NuFi will open in place of MetaMask/Flint.
You will get a prompt asking you to connect your Nufi wallet, Cardano, and Milkomeda C1 accounts.
Finally, bridge assets between chains. Assets bridged to Milkomeda C1 can be swapped for MilkADA and other tokens.
N.B: Bridging assets from Ethereum or Cardano to Milkomeda C1, will require some amount of MilkADA to pay gas fees for every transaction (sending assets, farming, swaps, etc.) However, if you can’t trade for MilkADA with those assets that you bridged, clearly you don’t have MilkADA to pay swaps, simply bridge ADA from Cardano to Milkomeda C1 to create MilkADA — that’s it!
Again, if you don’t have any ADA, don’t fret! You can swap ETH (or 400+ other assets) for ADA directly in your NuFi wallet.
Last updated